playing with flour

Buttercake with Berry Buttercream

IMG_2420

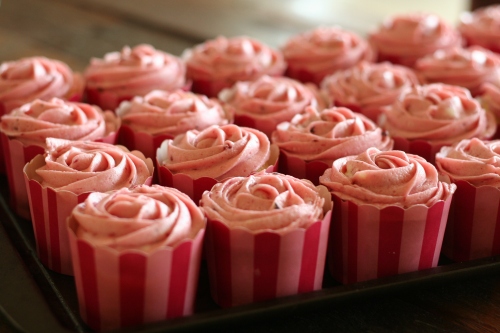
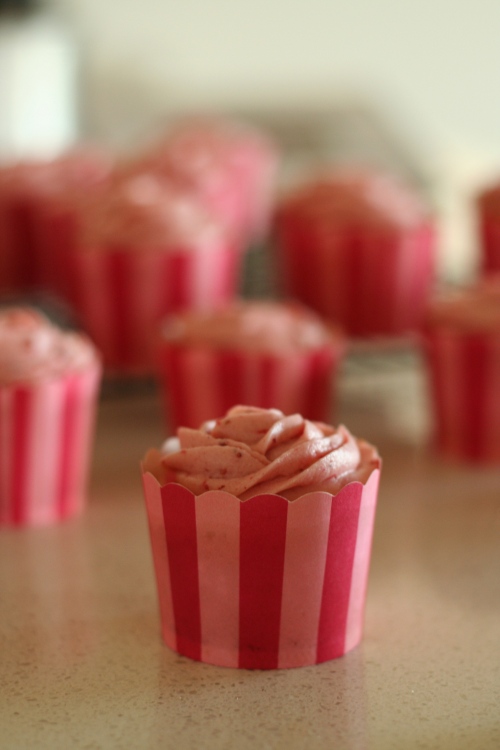
For the last few days all I’ve wanted is cake. Fluffy, buttery cake with frosting. Loaded with sugar and sweetness and perfect for undoing any hard work at the gym but worth it because it is just so satisfying. Rather than give in and buy one of those overpriced individual cupcakes from a bakery I whipped up this super simple recipe that makes about thirty cupcakes instead. Seemed like a good idea at the time but now I have to stop myself eating them all!

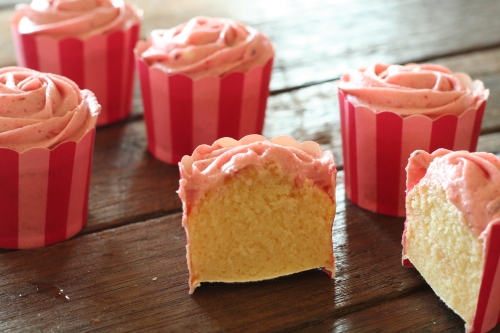
I’ve always found it tricky to find that perfect vanilla buttercake that is light and fluffy but still has a crumbly texture – you know, the one that pairs well with anything. Usually I find they’re just too dense or don’t rise enough which is incredibly frustrating. This recipe however lives up to its promises. The addition of buttermilk gives a light creaminess while the cornflour makes for an awesome texture.

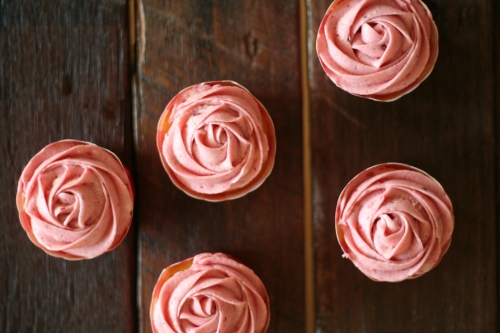
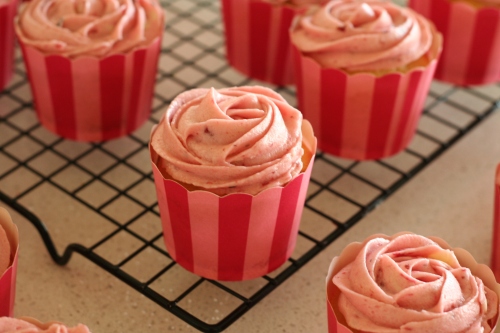
You could pair the cake base with pretty much anything but I went with a classic berry buttercream for a bit of tartness and colour. If you really hate seeds in your berries you can sieve them out before adding to your mixture but I really don’t feel it’s worth the trouble. Plus the seeds look pretty in the frosting! If you wanted to make a large cake instead of cupcakes that could easily be done, just increase the baking time by about 10 minutes.

IMG_2320 IMG_2338 IMG_2357 IMG_2483 IMG_2430 IMG_2443

Buttercake with Berry Buttercream

170g unsalted butter, at room temperature
350g plain flour
300g caster sugar
40g cornflour
2 tsp vanilla extract
3 eggs
1 ½ cups buttermilk
1 ¼ tsp baking powder
½ tsp baking soda
½ tsp salt

Preheat your oven to 180° and prepare your baking cases. In a bowl sift together the flour, cornflour, baking powder, baking soda and salt and set aside. Cream together the butter and sugar until light and fluffy. Add the vanilla and mix through. Add the eggs one at a time mixing well after each addition.

Stir through the buttermilk until well mixed, the mixture may look curdled at this stage. Mix through small amounts of the dry ingredients at a time until just mixed. Spoon into cases and bake for 20 minutes or until golden.

Berry Buttercream

½ cup frozen berries
240g unsalted butter, at room temperature
4 cups sifted icing sugar

Puree the frozen berries until smooth. If desired you can pass through a sieve to remove the seeds. Mix the butter until light and fluffy in a large bowl then slowly mix in the icing sugar until well mixed.

Mix through the berries until the colour is even. Pipe onto cooled cupcakes and enjoy 🙂
IMG_2472 IMG_2436

Caramelised Pear and Almond Cake

IMG_2135

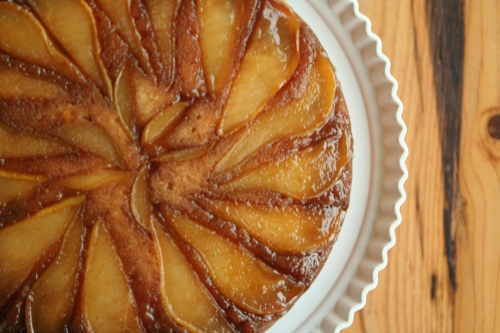
So it’s been a while huh? I could make excuses but to be honest I just got busy and lazy. I’m finally understanding what it means to be an intern – long days, stressful situations and very little time to do the fun things like baking. I’m not complaining though, I’ve learnt so much already and I’m actually enjoying it which I think has surprised me! When I did get some free time recently I took the opportunity to make dinner and dessert for a fellow intern who had resorted to eating microwaved meals – and this cake was the result.

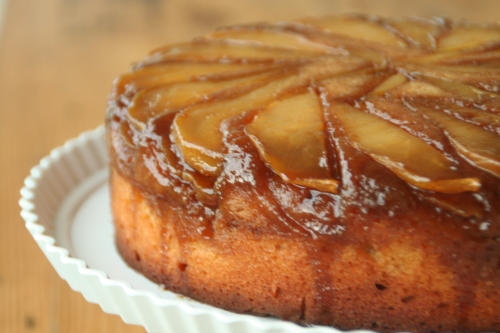
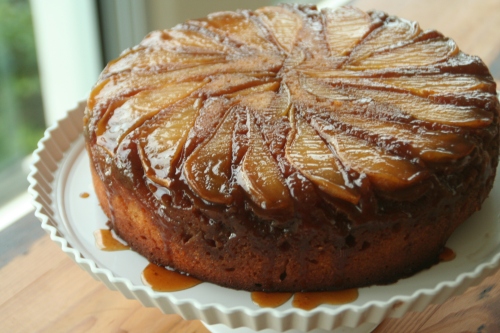
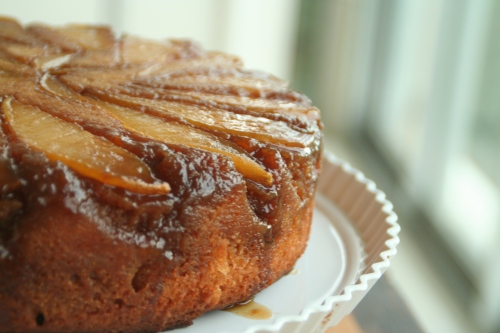
I’ve made this recipe a number of times and keep coming back to it. It’s a moist dense cake with sliced pears covered in caramel. Yep, it’s as good as it sounds. The almond meal and buttermilk make the cake super moist and as there’s a decent amount of caramel topping it sinks into the cake and runs down the sides – does it get better than that?

Hopefully this recipe makes up for my long absence. I’d recommend not overfilling your pan as you want the caramel to penetrate deep into the cake. I’d also suggest cutting your pears a bit thicker than I did as they have plenty of time to cook through and this will give you a good flavour and texture. If the cake gets dark too quickly cover it with foil for the rest of the cooking time and make sure you cook it only until just done.

Forgive me yet?

IMG_1933 IMG_1984 IMG_1997 IMG_2031 IMG_2120 IMG_2182

Caramelised Pear and Almond Cake

180g brown sugar
100g unsalted butter, melted
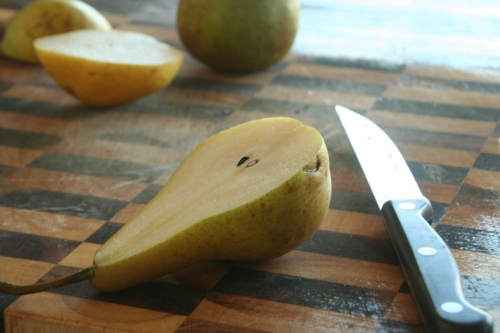
3 ripe pears cut into slices

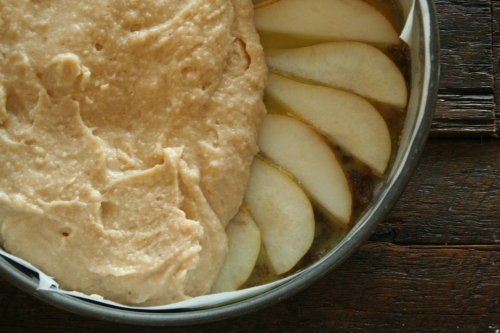
Preheat your oven to 180° and prepare your baking tin with baking paper. Pour the brown sugar over the base and top with the melted butter. Use a spoon to ensure all the sugar gets coated. Arrange the pear slices on top.

170g unsalted butter
250g caster sugar
3 eggs
250g plain flour
100g almond meal
1 ½ tsp baking powder
1 tsp cinnamon
½ tsp nutmeg
250ml buttermilk

Cream the butter and sugar until light and fluffy. Add the eggs one at a time, beating well with each addition. In a separate bowl sift the dry ingredients together then fold into the mixture. Stir through the buttermilk until just combined.

Pour over pears and cook for 60 to 80 minutes until just cooked in the center. Allow to cool in the pan for 10 minutes before inverting onto a plate. Best served still warm with ice cream.

IMG_2149

Hot Cross Buns

IMG_1479

I’m not above a little bribery. As previously mentioned we recently moved in order for me to start my new job. Very quickly it seems we’ve come around to needing to renew our lease and there’s a small amount of doubt as to how easy this will be to do. It’s not that we aren’t good neighbours but more so that our landlord may want to sell our unit. So, in hopes of persuading them that we should really be staying here I decided to make some appropriately timed hot cross buns.

I absolutely love any baking that involves having to use my hands – bread, pizza dough, pasta, even shortbread where you have to crumble butter into flour. It makes the whole experience so much more enjoyable (and yes, so much more messy). I’m still not that confident when it comes to using yeast but after buying a pizza stone and using it frequently I’ve learnt some tricks and can confidently make some basic doughs. The good thing about this recipe is it’s hard to get wrong.

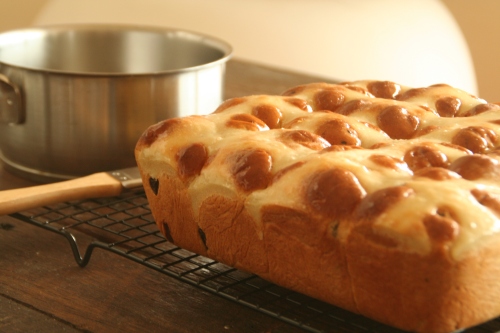
The awesome thing about hot cross buns is the endless varieties that can be produced. I chose to go with a somewhat traditional sultana and mixed peel rendition but also added some dark chocolate to break it up. I used 85% cocoa chocolate which is bitter and not very sweet as the fruit already has some sweetness but if you’d prefer you can use chocolate with less cocoa.

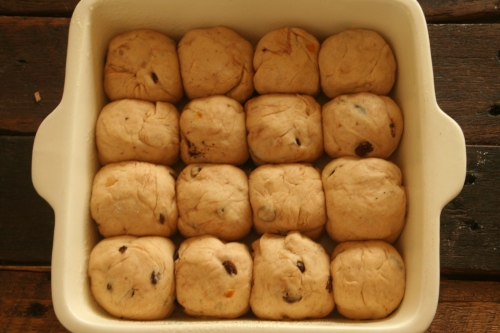
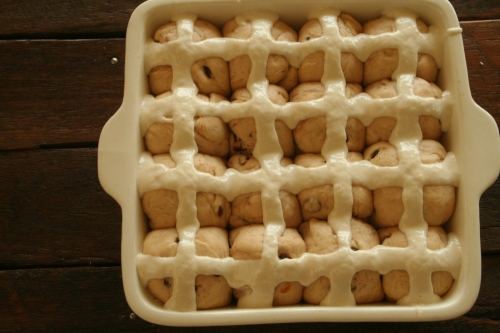
My tip for this recipe is to make your paste for the crosses quite thick. As you can see from my pictures my crosses spread considerably and don’t have quite the classic look. When you pipe, do one row at a time and stop the flow of paste with your finger before moving on to the next row. There is a lot of waiting involved in this recipe but it is simple and easy to make and the buns are perfect gifts for anyone you feel like putting in a good mood 😉

Happy Easter x

IMG_1356 IMG_1387 IMG_1413 IMG_1425 IMG_1466 IMG_1511

Hot Cross Buns

14g dried yeast
¼ cup caster sugar
1.5 cups milk
4 cups plain flour
½ tsp nutmeg
½ tsp cinnamon
1 tsp mixed spice
60g unsalted butter, at room temperature
½ cup sultanas
1/3 cup mixed peel
40g dark chocolate
1 egg

Warm milk in saucepan over low heat, do not let boil. Combine with yeast and sugar and cover with cling wrap. Allow to sit for 10 minutes or until frothy.

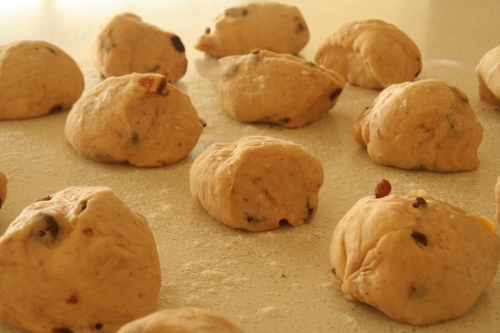
In a large bowl sift in the flour and spices then rub the butter in with your fingertips. Add the yeast mixture, egg, fruit and chocolate and mix well until you have a soft dough. Cover and let sit for 1 hour until doubled in size.

Preheat your oven to 200° and grease a 23cm square baking tin. Knead the dough on a floured surface until smooth (4-5 minutes) then divide into 16 even pieces. Roll each piece into a ball then place in tin. Once all pieces are arranged allow to sit for 10 minutes.

Paste

½ cup plain flour
2 tsp caster sugar
Approx 1/3 cup water

Make your paste by mixing just enough water into the flour and sugar. Ensure the mixture is smooth before piping onto buns. Bake in oven for 20 minutes or until golden. Allow to cool on a wire rack.

Glaze

1 tbsp caster sugar
1 tsp gelatin
1 tbsp water

Combine the above ingredients in a small saucepan and heat slowly without boiling until completely dissolved. Brush onto still warm buns. Allow to set and cool before eating.

IMG_1520 IMG_1526

Espresso Mud Cupcakes

IMG_1176

There is nothing wrong with super sweet cakes and cookies but sometimes you need a grown up dessert. Something rich and sexy to share with a loved one or hide away and eat for a few secret minutes of self indulgence. These cupcakes fit that description perfectly.

Full of dark sinful flavours of chocolate and espresso, instead of being overly sweet they have a slight bitterness to them that may not sound appealing but is actually delicious. These are an adults only treat with Kahlua and coffee, so wouldn’t recommend giving these to children!

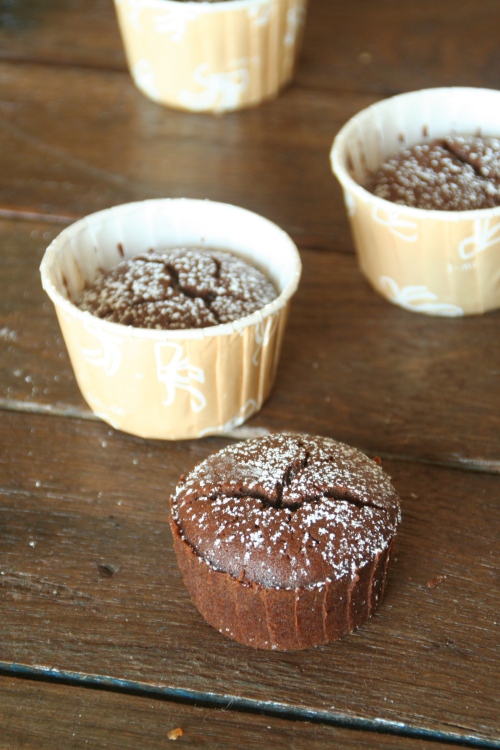
Initially I had planned to pair these cupcakes with a peanut butter or Nutella frosting but upon doing so found they lost some of their complexity and sexiness (don’t worry I taste tested thoroughly for you to make sure). All they need to be perfect is a light dusting of icing sugar.

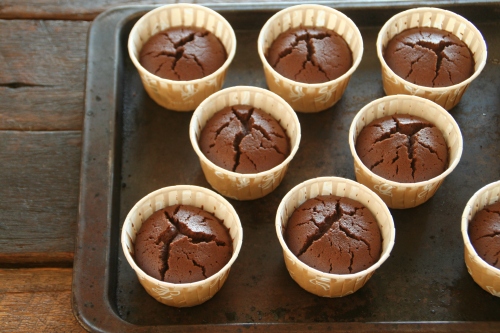
I would recommend making these in small sized cupcake liners as they are seriously rich, and be sure not to overcook them to ensure a moist cake. If you wanted to convert into one large cake I would recommend doubling the recipe.

IMG_1063 IMG_1086 IMG_1099 IMG_1104 IMG_1221

Espresso Mud Cupcakes

125g unsalted butter
100g quality dark chocolate
½ cup hot water
2 tbsp espresso powder
50ml Kahlua
1 cup brown sugar
150g plain flour
½ tsp baking powder
1 tbsp cocoa
1 egg

Preheat your oven to 160° and prepare your cupcake liners. In a medium saucepan combine the chocolate, butter, water, Kahlua and espresso. Melt over medium heat, stirring until combined. Stir in the brown sugar and allow to cool for a few minutes.

Sift in the flour, cocoa and baking powder and stir through. Add the egg and ensure the mixture is thoroughly combined. I would recommend pouring into a jug with a pouring lip before filling your cupcake liners to save on mess. Fill to 2/3 full and bake for 15-20 minutes or until just cooked through. Allow to cool before dusting with icing sugar.

IMG_1149 IMG_1142

Sour Cherry Torte

IMG_0661

When we first moved cities for work I was worried that I wouldn’t being having spur of the moment dinner parties with a group of fabulous people anymore. Last week I was definitely proved wrong. After a rough week on evening shifts all I wanted to do was have a glass of wine (or two) and eat a lot of food. I was lucky enough to rope in some new friends from the hospital and also convinced a couple of med school friends to travel up to join me. The result was a fun night of conversation and games that was finished off with an awesome dessert.

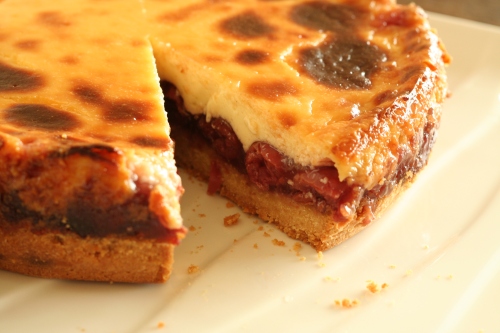
This torte is fantastic. Crunchy biscuit layer topped with sour cherries and topped with smooth sour cream. Personally I think the biscuit layer was a bit thick, so feel free to use a bit less of the mixture if you’d prefer it a bit thinner. Having said that, it is quite a crunchy base that doesn’t go soggy so a thick layer isn’t a big problem. You could use any sort of berries for the middle layer but I found these fantastic sour morello cherries that worked so well. If you can, I’d highly recommend hunting these down, they work perfectly with the sour cream.

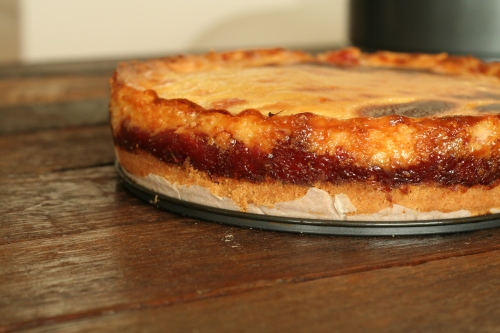
The torte takes quite a while to cook and does tend to go quite brown on top which I was initially a bit concerned about. Don’t stress, this is how it should be. Once the topping appears set it’s ready, just allow to cool completely in the pan and make sure you run a knife around the edges to ensure no juicy bits are stuck before removing the tin. We’ve been eating the leftovers straight from the fridge which is pretty delicious but it is a bit better served at room temperature.

IMG_0550 IMG_0567 IMG_0588 IMG_0605 IMG_0643

Sour Cherry Torte

Base

1.5 cups plain flour
1/2 cup caster sugar
1/2 cup almond meal
1.5 tsp baking powder
4 oz unsalted butter

Preheat the oven to 200º and prepare a springform pan. In a food processor combine all the ingredients and pulse until you get well combined crumbs. Pour into the pan and press in evenly. Bake for 10-15 minutes or until golden. Allow to cool.

Sour Cherry Filling

700g morello cherries in syrup
1/4 cup caster sugar
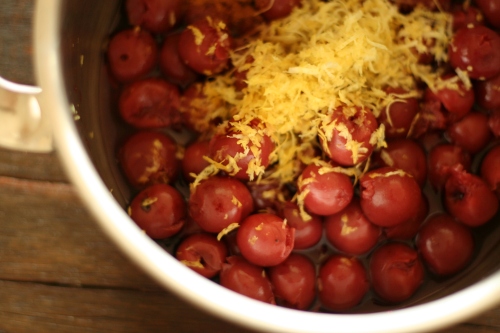
Grated zest of 1 lemon
1/2 tsp cinnamon
1/4 cup cornstarch

Drain the cherries reserving 1 cup of the liquid. In a saucepan combine all the ingredients with the liquid and heat over low to medium heat stirring for 5 minutes. The mixture should thicken and become fragrant. Allow to cool somewhat before pouring over the biscuit base.

Sour Cream Topping

500g sour cream
2 egg yolks
1/2 cup caster sugar
2 tsp vanilla extract

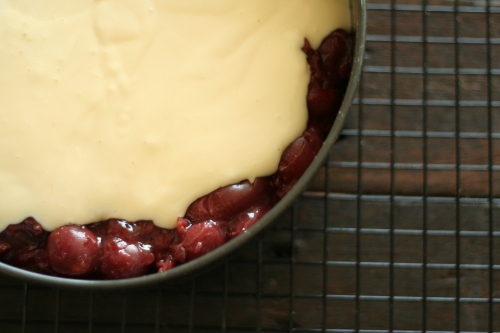
Mix all the ingredients in a bowl with a whisk until combined. Pour over the cherry filling and smooth with a spatula. Lower the heat in the oven to 180º and bake the torte for 45-50 minutes or until the topping is set. Allow to cool completely in the pan before removing the tin. Enjoy.

IMG_0652 IMG_0680

Cookies and Cream Cupcakes

IMG_0454

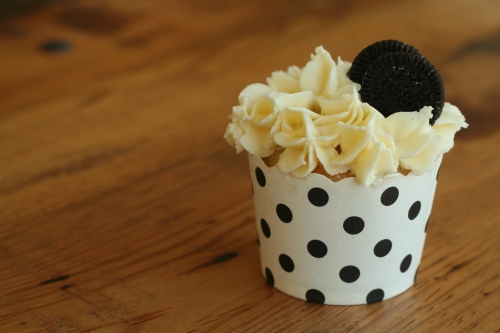
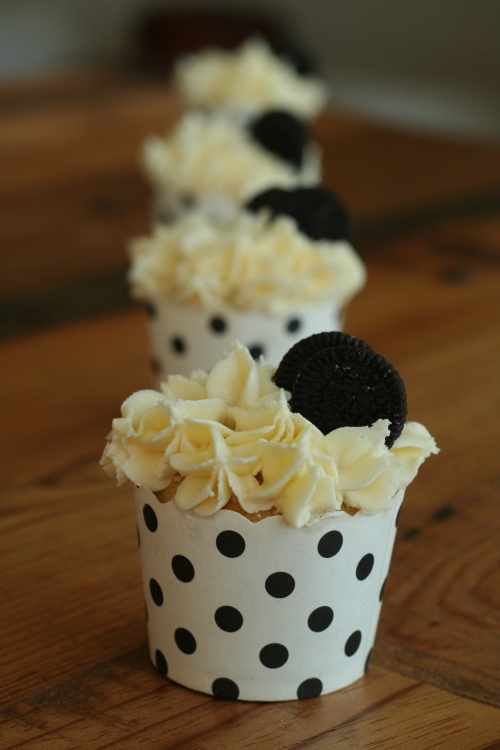
Ah, night shifts. The highly dreaded, anxiety fueling week that all interns dread. Well, most interns anyway. I do know of some people who actually look forward to night shifts, but I definitely wasn’t one of them. My biggest concern was staying awake through the night, especially as I don’t drink coffee. I was convinced I’d get to 3am and just fall asleep at a desk, or worse, while sitting with a patient. So I came up with a plan – eat plenty of sugar! That’s where these cupcakes came in. Ok, I’ll admit I had another motive as well as keeping my eyes open – I figured a little bribery of the other staff might help make things easier.

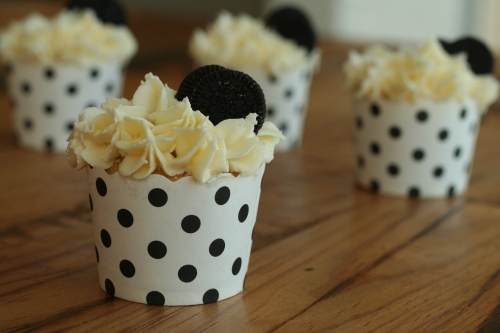
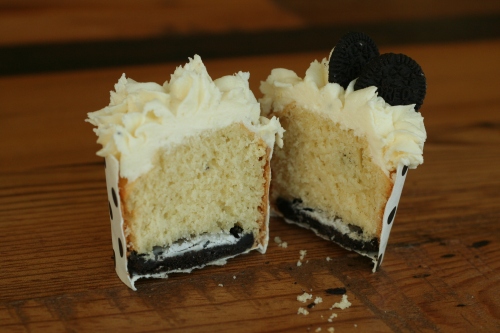
These cupcakes were born from me having a spare packet of Oreo’s and a need for something sweet. They’re a double hit of vanilla with flavouring in both the cupcake and the frosting but it isn’t overpowering thanks to the Oreo in the base and throughout the cake. To be honest I’d be keen to up the vanilla flavour a bit more using a vanilla pod but I’d run out so it they ended up fairly subtle – it’s up to you what you’d prefer to use. If you’re looking for something to make for Valentine’s day these would be perfect – and even more so if you used the pink Oreos (I think they’re strawberry?).

Oh and in case you were wondering, night shift was actually great fun. I stayed awake all night, saw a great mix of patients and slept so well once I got home!

IMG_0354 IMG_0364 IMG_0373 IMG_0389 IMG_0452

Cookies and Cream Cupcakes

1 oz soft unsalted butter
1 cup caster sugar
2 tsp vanilla essence
2 eggs
2 cups plain flour
1 tbsp baking powder
3/4 cup milk
1 packet Oreo’s split in half

Preheat the oven to 180º and prepare your baking cups. Cream the butter with the sugar then add the vanilla essence. Beat in the eggs one at a time then sift in the flour and baking powder. Stir through the milk. Break up half of the Oreo’s into pieces and stir through the batter.

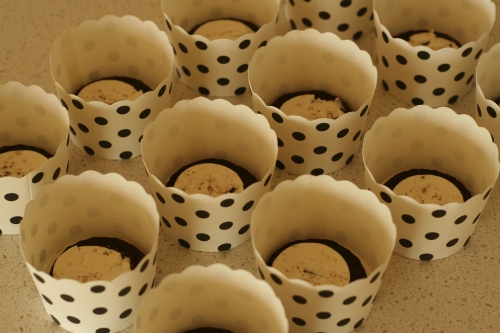
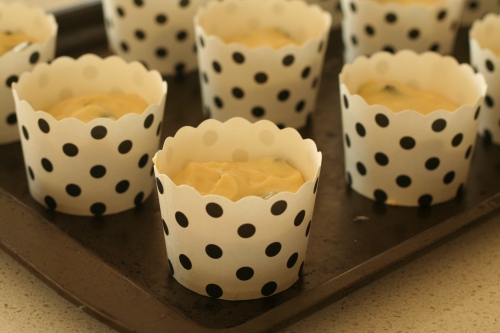
In the base of each cupcake liner place half of an Oreo (the side with the cream) then spoon over the batter until 2/3 full. Bake for 25-30 minutes or until a skewer inserted comes out clean. Allow to cool before frosting.

Vanilla frosting

8 oz salt reduced butter
4 cups sifted icing sugar
2 tbsp milk
2 tbsp vanilla essence

Beat the butter with the sugar until smooth then add the milk and vanilla. Beat for at least 5 minutes of until light and fluffy. Pipe onto cupcakes then top with mini Oreo’s.

IMG_0469 IMG_0424 IMG_0464

Chocolate Raspberry Truffle Cake

IMG_0283

I was always the kid at school whose birthday fell in the holidays before school started. While it may seem like a great thing to be on holiday it never felt that way for me, I always felt that I missed out on bringing cupcakes to class or getting all the attention for the day from people who wouldn’t otherwise know it was my birthday. As I’ve grown up I’ve realized these things aren’t actually important and now that I’ve started working I’d be pretty happy to still be on holidays come late January! I don’t generally do anything fancy to celebrate but this year I wanted to have dinner with the friends that got me through med school and I was lucky enough to have some of my new colleagues come along too. I find the great thing about starting a new job is meeting new people and although it’s only been a couple of weeks I feel as though I’ve already made some great friends – some of which are people I previously knew (but not well) and some who I’ve only just met. Instead of making cupcakes I decided to make a slightly more grown up birthday treat – chocolate and raspberry truffle cake.

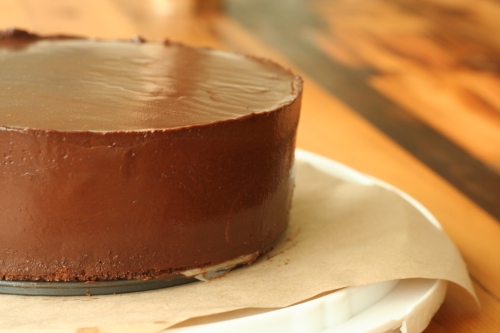
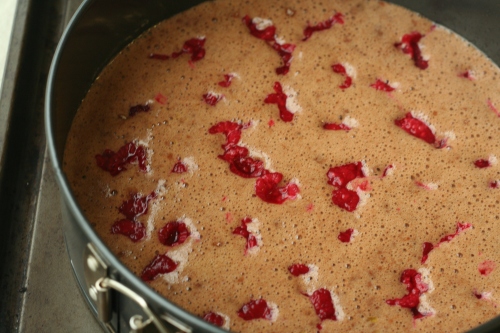
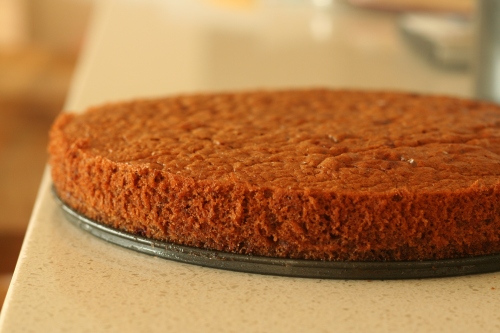
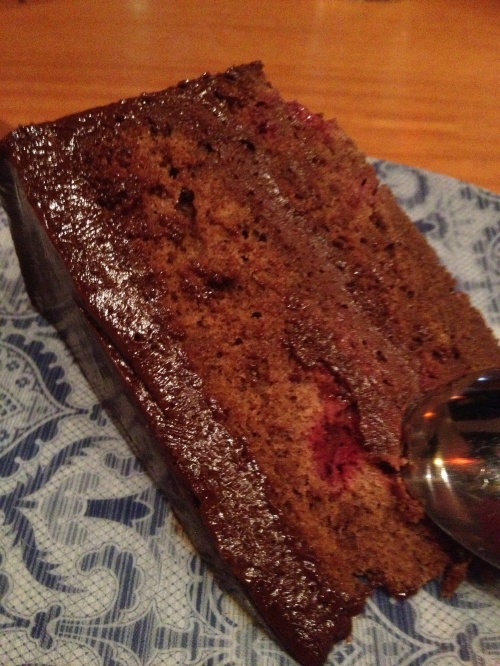
This cake is rich and decadent and a small piece is probably enough (although that didn’t stop some people from having seconds). Layers of light spongy cake studded with raspberries are sandwiched between creamy rich chocolate truffle frosting. The raspberries are tart enough to set off the sweetness and the cake layers aren’t so dense you can’t finish.

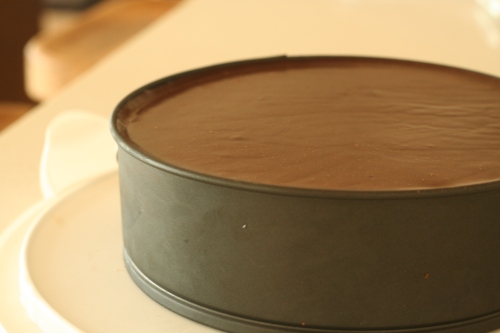
I love the technique of pouring the frosting over the cake while it is in the tin to get smooth layers. This saves on frosting time and looks really elegant. You may have to do some touch ups after removing the tin, just use a warm dry spatula to spread leftover frosting where needed. The cake is open to all sorts of decorating possibilities but I loved how simple and classy it looked plain (and this looked even better with sparklers in it at dinner). I apologize for not having a decent photo of the cake cut but it was a dark restaurant – trust me when I say that each layer was defined and evenly spaced and looked fantastic.

IMG_0207 IMG_0229 IMG_0245 IMG_0262 IMG_0320

Chocolate Raspberry Truffle Tart

1 cup plain flour
4 tbsp cocoa powder
2/3 cup caster sugar
8 eggs
200g melted butter
1 cup raspberries

Preheat your oven to 180º and prepare two springform baking tins. Beat the eggs and sugar in a bowl until thick and creamy (at least 5 minutes) then sift in and fold through the cocoa and flour. Divide between the two tins then sprinkle the raspberries over the top. Bake for 25 minutes or until set. Allow to cool in the tins.

Truffle Frosting

450g quality dark chocolate
2 cups cream
6 egg yolks
1/3 cup caster sugar

Melt the cream and chocolate over a low heat until melted and smooth. In a separate bowl whisk the eggs and sugar over simmering water for at least 5 minutes or until thick and creamy. Fold the chocolate through the eggs and beat on low speed until cool.

Place one layer of cake in the springform tin then pour over half of the truffle filling. Place the second cake on top then pour over the rest of the frosting, it will run down the sides of the cake. Place in the fridge until cold and set. Carefully remove the tin after warming the sides with a warm cloth.

IMG_0300 IMG_0166

Chocolate Chunk Shortbread Cookies

IMG_2698

The weather is absolutely insane here. It was only weeks ago that it was so hot it was hard to do anything strenuous, now its raining so hard areas are flooding, we lost power temporarily and I have to continually mop up our floors as the water seeps in under the windows! It’s the perfect day to read a book, watch a movie or bake cookies. If you’re in need of some inspiration these cookies are a pretty good option.

I started work last week after a thorough orientation meeting some of my super friendly and interesting colleagues. I knew that Monday morning would be highly stressful as I had no idea of how things worked or what the local protocols were (well, that and I feel like all the knowledge I once had has left my brain after a three month holiday!), so I made these cookies as a comfort measure to eat when I was feeling overwhelmed. Turns out they work wonders.

Crumbly and light, they literally melt in your mouth. Add in the chunks of white chocolate they’re a fantastic pick me up with a cup of tea and aren’t overwhelmingly sweet so it’s easy to eat a couple without even thinking about it (which may not be the best thing for the waistline!). Feel free to swap the white chocolate with dark or milk chocolate or even something crunchy like peanuts or smarties, personally though I think the white chocolate pairs really well with the cocoa in the cookies.

Yes I do realize there is a lot of butter in this recipe but I’ve found that decreasing the amount stops the cookies from being as decadent and they don’t have the melting quality that makes them so endearing. Just do what I do and give them away before you eat them all.

IMG_0127 IMG_0136 IMG_0144 IMG_0175

Chocolate Chunk Shortbread Cookies

1 3/4 cups plain flour
3 tsp baking powder
4 tbsp cocoa
250 g unsalted butter, at room temperature
125 g caster sugar
Pinch of salt
200g white chocolate, chopped

Preheat your oven to 160º and prepare baking trays. Sift together the cocoa, flour, baking powder and salt. In a separate bowl beat the butter until soft, then add the sugar and beat until pale and fully mixed (the longer you beat the light the cookies become – give it at least  2 minutes). Add the cocoa mixture and beat until combined into a soft dough.

Add the white chocolate and stir through. Take tablespoon sized amounts of dough and roll into balls. Place on the baking tray and flatten with a fork. Bake for 10-12 minutes or until firm on top. Allow to cool on the tray until they firm up then transfer to a wire rack to cool completely.

IMG_0166

Almond and Rhubarb Pannacotta

IMG_0107

Wow it’s hot. The heatwave is starting to have an effect on me, I’m tired and cranky and have no desire to do anything but lie on the couch and read novels. Not that there is anything wrong with that, it’s pretty much a perfect afternoon for me, but it is hard to be productive when you’re melting.  For anyone not in Australia we’re currently experiencing some super hot and dry days, with temperatures exceeding 45° in some areas. It’s been up to 38° here at home and I’ve spent some of those days moving furniture around, which in hindsight was not the smartest idea. Unfortunately my problems are only minor compared to others, as the heat is leading to bushfires throughout the country and many people have lost everything. If you’ve been affected or you’re in a risky area I hope you’re safe and doing all right, my thoughts are with you.

When it’s this warm it is hard to get up the motivation to bake anything and turning on the oven seems ridiculous. This is where these desserts come in. Creamy smooth pannacotta, fragrant with the smell of almonds layered with tangy bright rhubarb – it’s the perfect treat to cool you down.

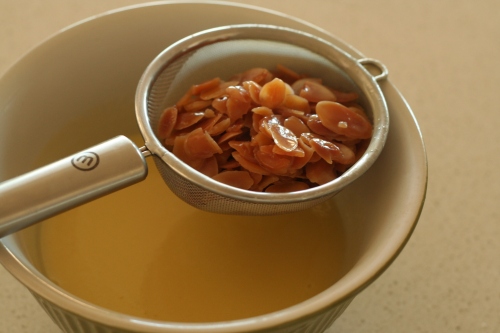
The almonds infuse really well into the milk and leave a sweet and strong liquid that sets to give a complex and delicious custard. While they’d be fantastic just like that the rhubarb simmered with vanilla gives a great contrast and freshness to keep the dessert from being too heavy. If you don’t have a vanilla pod use a teaspoon of vanilla essence instead. If you buy pre-toasted almonds there is only a small amount of stove work needed, so this is a simple and delicious treat for a hot day.

IMG_0025 IMG_0035 IMG_0046 IMG_0063 IMG_0074

Almond Pannacotta

3 tsp gelatine
½ cup sliced almonds
300g cream
80g caster sugar

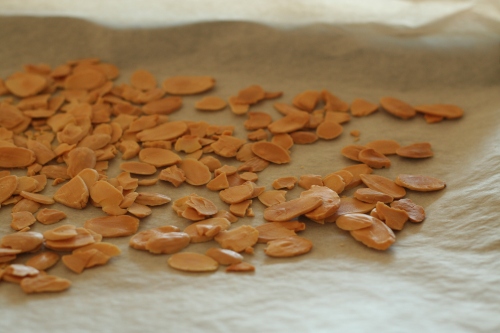
Preheat the oven to 180° and spread the almonds on a tray. Place in the oven and toast for 5-10 minutes until golden and fragrant. While cooking place the cream and sugar in a saucepan and bring to the boil. Once toasted immediately add the almonds to the mixture and turn off the heat. Cover with a lid and let sit for half an hour to infuse.

Sprinkle the gelatine over the almond mixture and turn the heat back on until small bubbles appear around the edges of the liquid. Stir the mixture thoroughly to ensure the gelatine is dissolved. Strain through a sieve then ladle into glasses or pannacotta moulds. Place in the fridge for half an hour to cool before adding the rhubarb.

Vanilla rhubarb

2 cups chopped rhubarb
½ cup sugar
Vanilla pod

Place all ingredients in a saucepan and heat over medium heat for 10-15 minutes or until the rhubarb is soft, stirring occasionally. Remove the vanilla pod before spooning on top of the pannacotta. Return to the fridge for another hour to set completely.

IMG_0101IMG_0090

White Chocolate and Caramel Gingerbread Blondies

IMG_8152

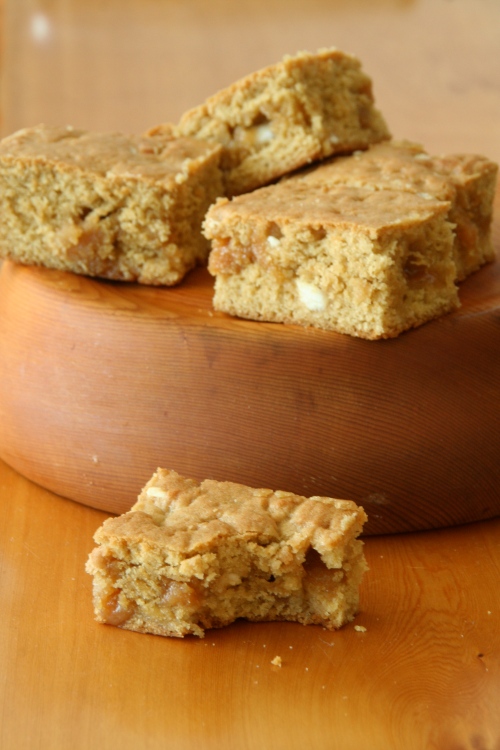
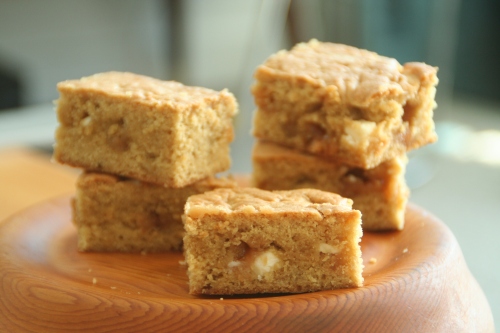
So it’s starting to dawn on me that I have to start being a grown up as of next week. It’s been so long since I’ve had a full time job, I’ve been living the student life for nine years now. While I’m sure the hours are going to be a shock to the system, I think the fact that I have responsibility and will be making decisions regarding people’s health is what is really stressing me out. Yes I’ve been preparing for this for years and I know I’ll be well supported but it really is a lot of pressure – it really is the perfect time to do some stress-relief baking!

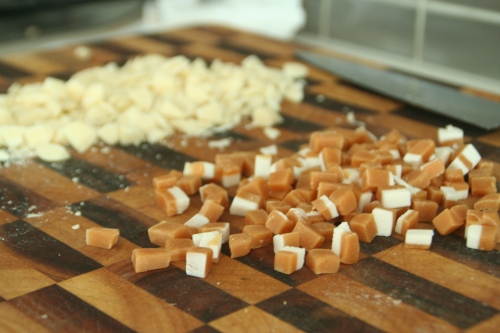
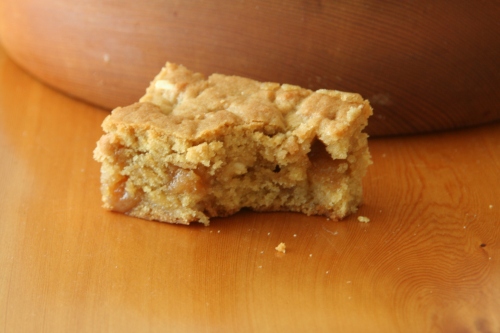
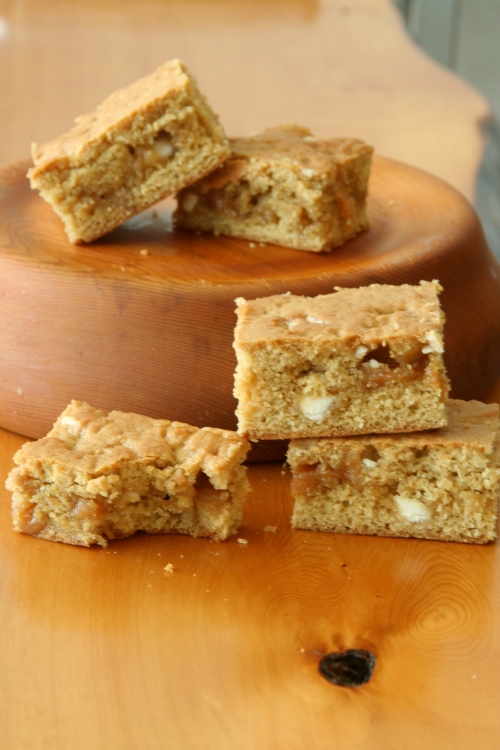
These blondies are delicious. Moist, dense and full of flavour they’re super easy to make and can be adapted to use whatever you have on hand. Replace the Jersey caramels with caramel or butterscotch chips or even dried cherries or cranberries and the white chocolate with milk or dark to give a completely new taste. The ginger pairs really well with the white chocolate and keeps it all from being too sweet.

I found the best time to eat them was still warm, straight out of pan but they’re also great once cooled or even out of the fridge if you want them a bit more dense. If you have new years resolutions to eat better this year I would recommend giving these away as soon as possible (do keep one or two for yourself of course) to avoid the temptation to eat the whole pan. Trust me.

IMG_8080 IMG_8085 IMG_8094IMG_8170 IMG_8112

White Chocolate and Caramel Gingerbread Blondies

1 ¾ cups plain flour
2 tsp ground ginger
1 tsp vanilla extract
½ tsp baking soda
½ tsp salt
4 oz unsalted butter
60g golden syrup
½ cup brown sugar
2 eggs
½ cup white chocolate, chopped
½ cup Jersey caramels, chopped

Preheat the oven to 180° and prepare a 9 inch baking pan with baking paper. In a large bowl cream the butter and sugar until thick and pale. Add the golden syrup and vanilla and beat until combined. Add the eggs one at a time, beating well between additions.

Sift over the flour, baking soda, salt and ginger and fold through the mixture. Add the chocolate and caramel and mix through until just combined. Pour into pan and smooth over the top with a spatula. Bake for 15 minutes or until a skewer inserted comes out clean. Allow to cool in pan before cutting.

IMG_8157IMG_8166